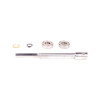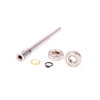


Heli motor shaft kit for all Tengu 4530 motors with an (external) shaft length of 35mm to fit SAB Goblin & XLPower Specter helis (and other models requiring the same shaft length).
Includes 2 pcs. 697zz EZO bearings, fits Tengu 4530/510kV & 4530/470kV.
No reviews have been submitted for this product yet.
Changing or replacing the shafts on our EGODRIFT Tengu motors for rc helis is a fairly easy and straightforward process. Simply follow the steps outlined below or watch the video on our YouTube channel that will demonstrate the process for you.
1) Remove the retainer ring (c-clip) from the shaft
Using a special pair of pliers made to remove c-clips (or any other appropriate tool) and while applying caution not to damage the clip, remove the retainer ring from the shaft. The clip can be found on the bottom of the motor where the shaft portrudes the can/bell.
2) Locate the shaft screws
Two worm screws are holding the shaft (centered) inside the bell. They can be found when looking through the six round cutouts near the top of the motor (where the stickerbomb printed face is). With a solid 2.0 mm hex driver carefully loosen those screws and remove them from the inside of the motor.
3) Remove the shaft
After the retainer ring (c-clip) and the worm screws have been removed, you should be able to slide out the shaft towards the top of the motor. Be careful not to apply too much pressure or force when trying to remove the shaft, not to damage the bearings.
4) Insert the new / replacement shaft
Take the new shaft you want to place in the motor, and insert it the opposite way you removed the old one. Again, please apply caution when routing the shaft through the bearings (or replace those with new ones from the shaft kit in case you ordered a full kit). Make sure to fully insert the shaft into the motor. If done correctly, the holes for the worm screws and the milled ring for the retainer clip should be in the exact same position as before disassembly.
5) Secure the shaft with screws
Carefully insert the worm screws and tighten them alternating in small steps, to ensure the shaft is centered. You can check the correct position by making sure the shaft spins evenly and freely.
6) Re-attach the retainer clip
To finish the assembly, reattach the retainer clip to the milled ring on the shaft near the bottom of the motor. Check that the shaft is centered and does not oscillate.
Done.
Disclaimer: During assembly in the factory, we check the balance of each motor to ensure the shaft is dead centered and the there is no play to either side. We do not take responsibility for any damages resulting from improper replacement of the shafts on our motors without proper balancing.


